This project cost me about $12
Supplies
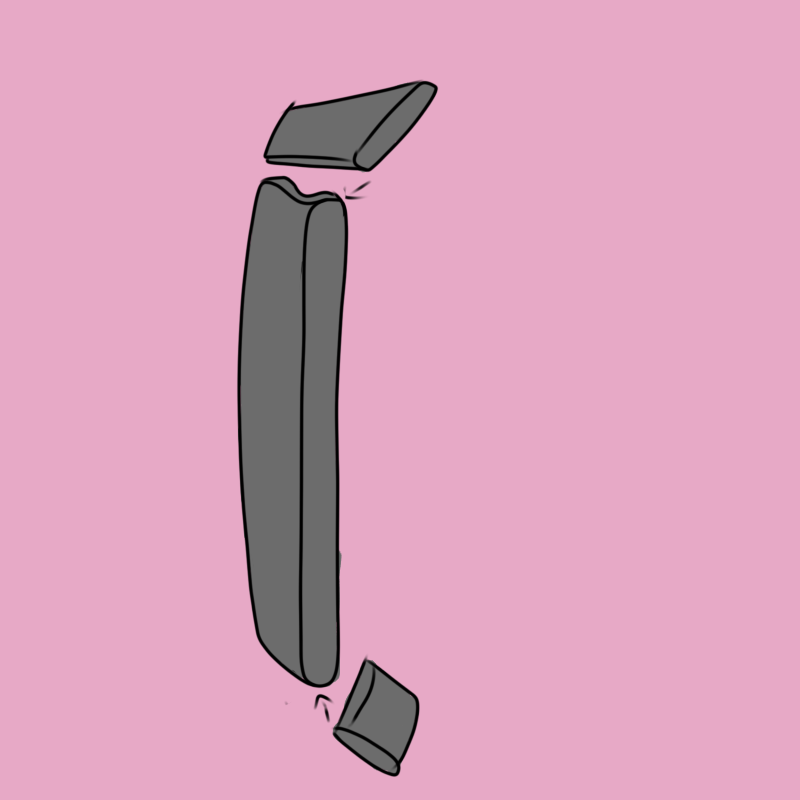
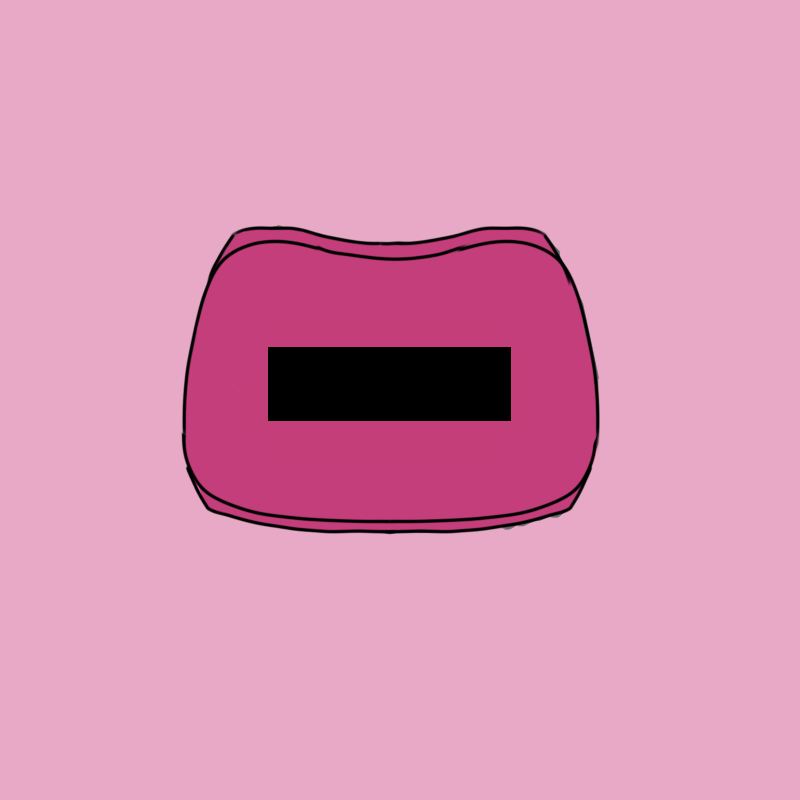
Step 1
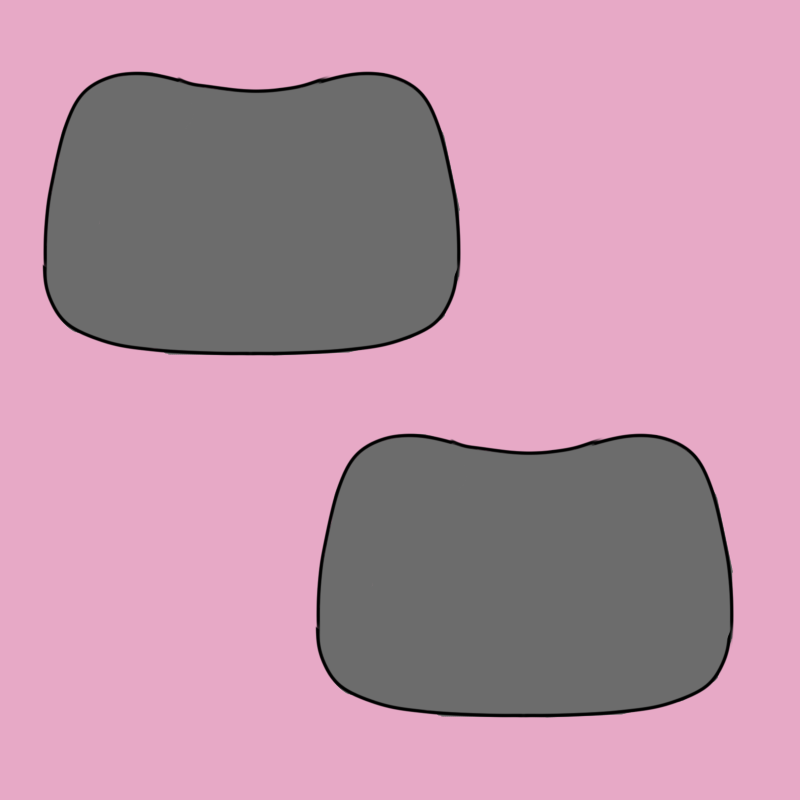
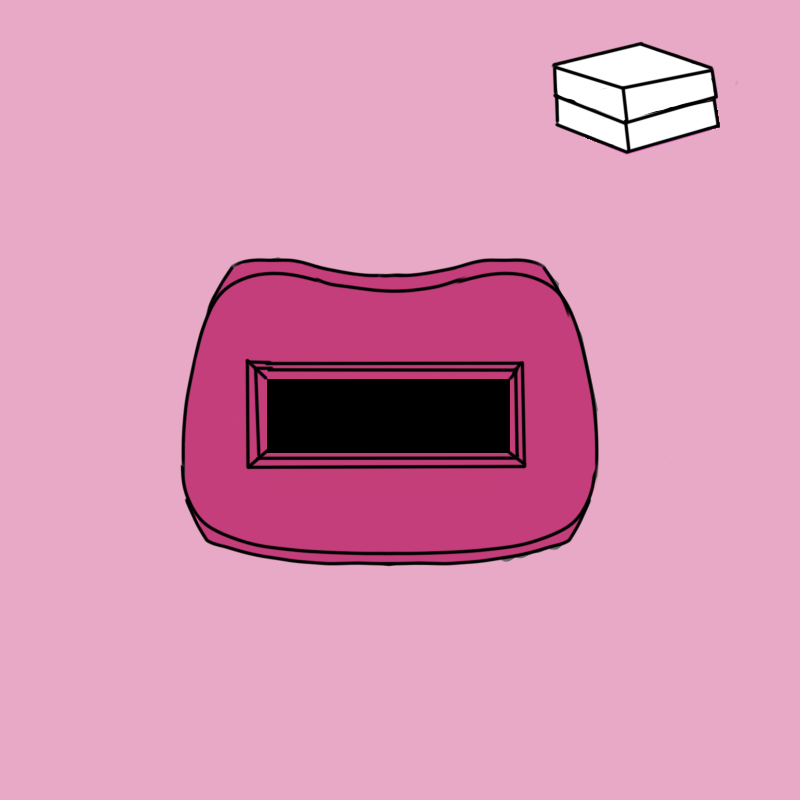
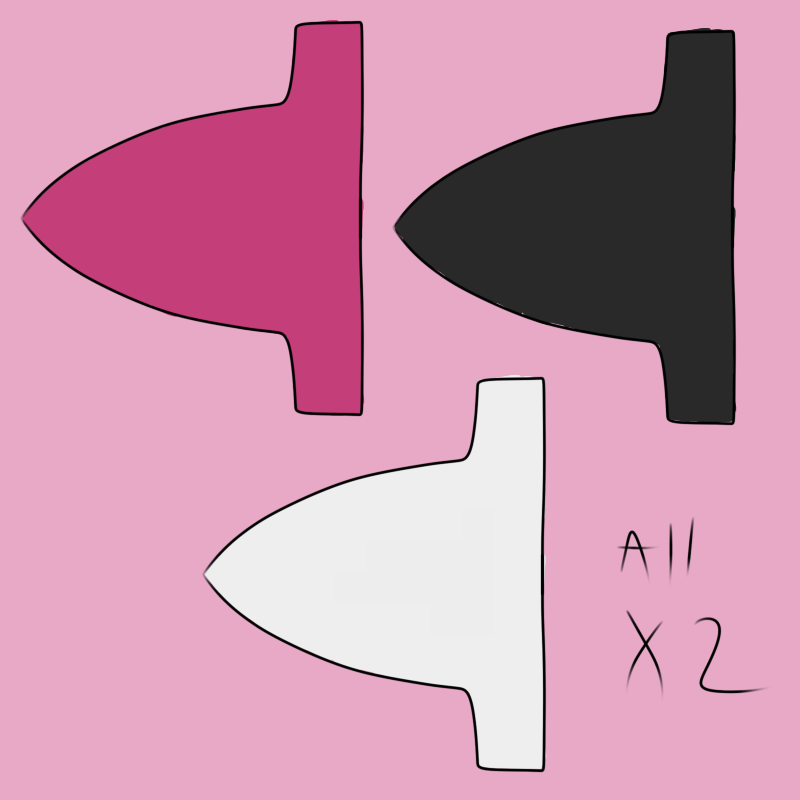
First I cut out two shapes like this out of the EVA foam. Now my shapes were 9 inches on the biggest parts, 8 inches in the middle dip, and 15 inches across. (But your pieces may need to be bigger or smaller to fit you better)
Step 2
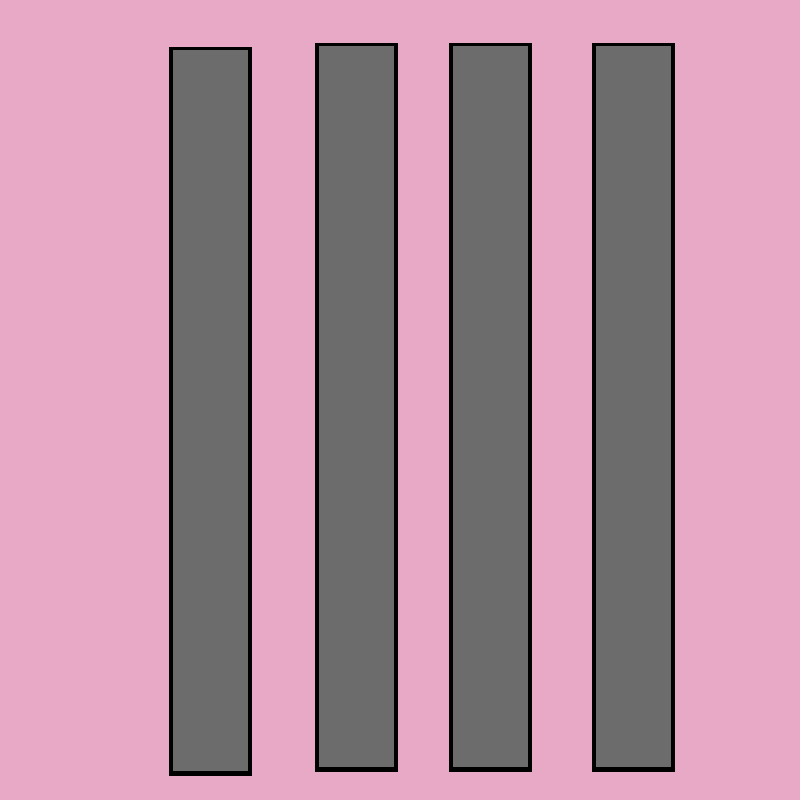
I then cut out 4 pieces of the EVA foam that were 1 1/2 inches wide, and 17 inches long.
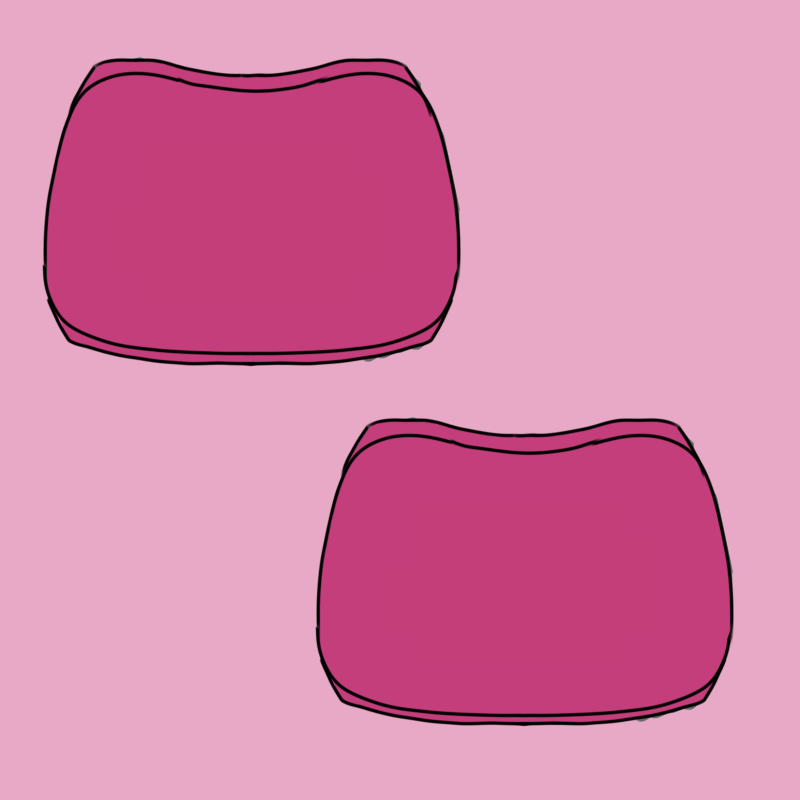
Step 3
Next I glued the strips to the tops and bottoms of my shapes, this gives it a bit more dimension, instead of just having a flat piece of EVA foam on your chest and back.

Step 4
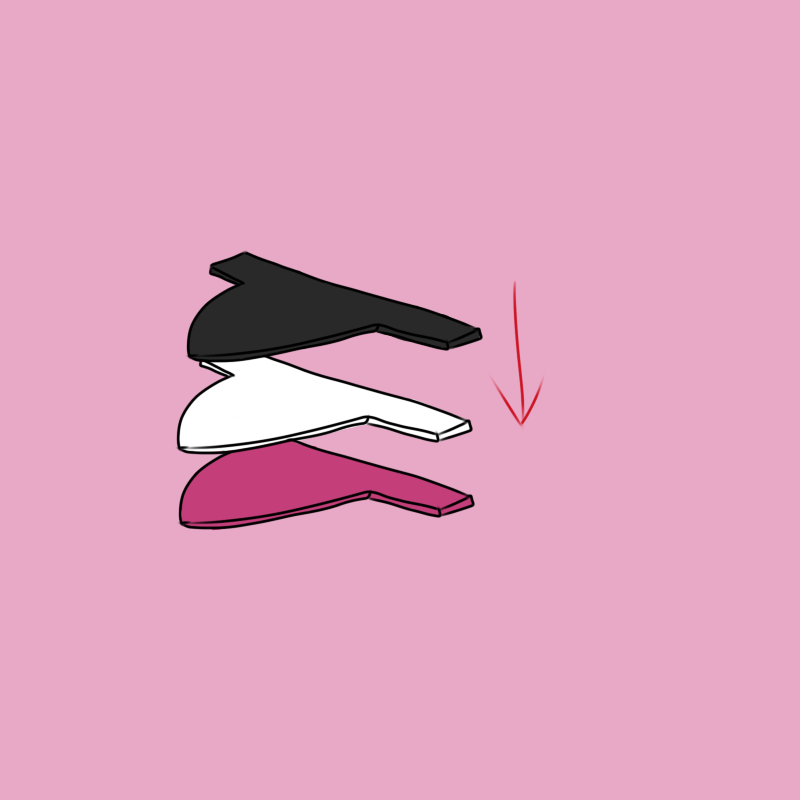
Then I covered the fronts, tops, and bottoms of the pieces with my pink fabric.
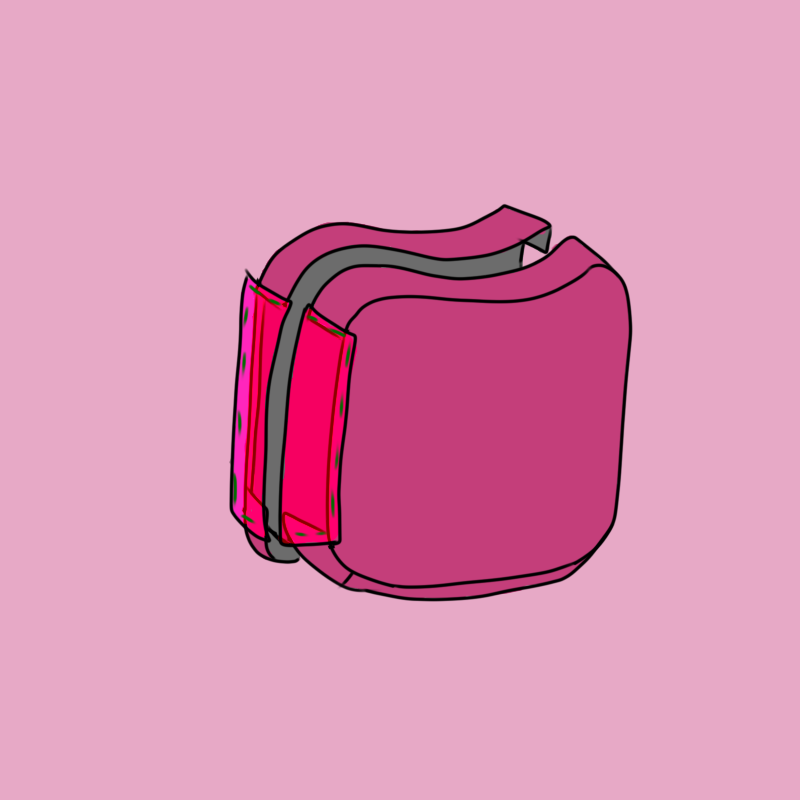
Step 5
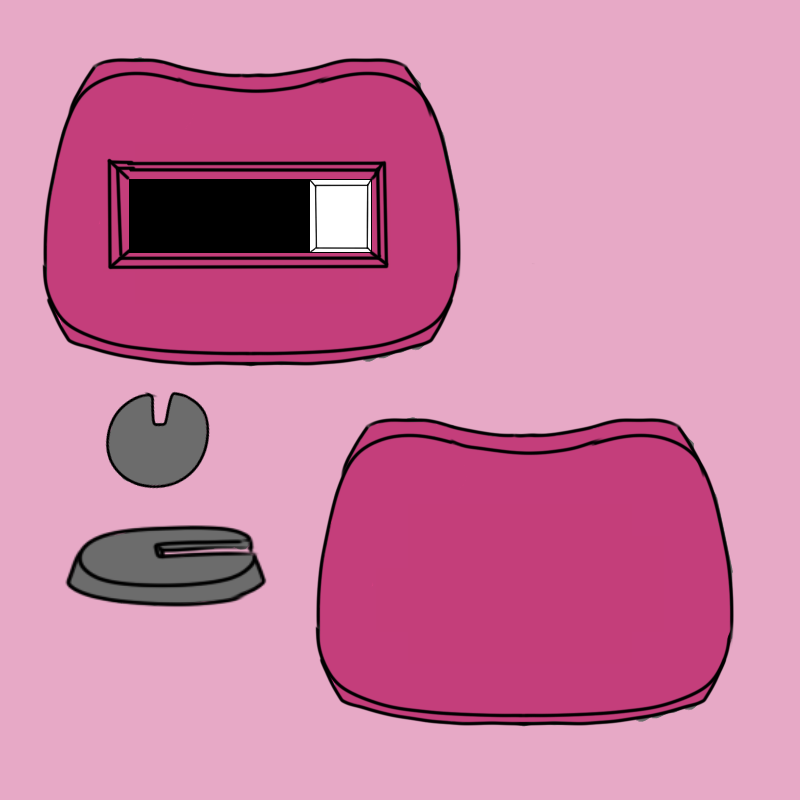
Now it is time to anchor the pieces together. On one side I cut a piece of fabric that was 7 1/2 inches long and 4 inches wide, and stitched it along the front and back of the pieces, as well as the tops and bottom where it touched the foam. (Again the size of the fabric piece will depend on how big your foam pieces are)

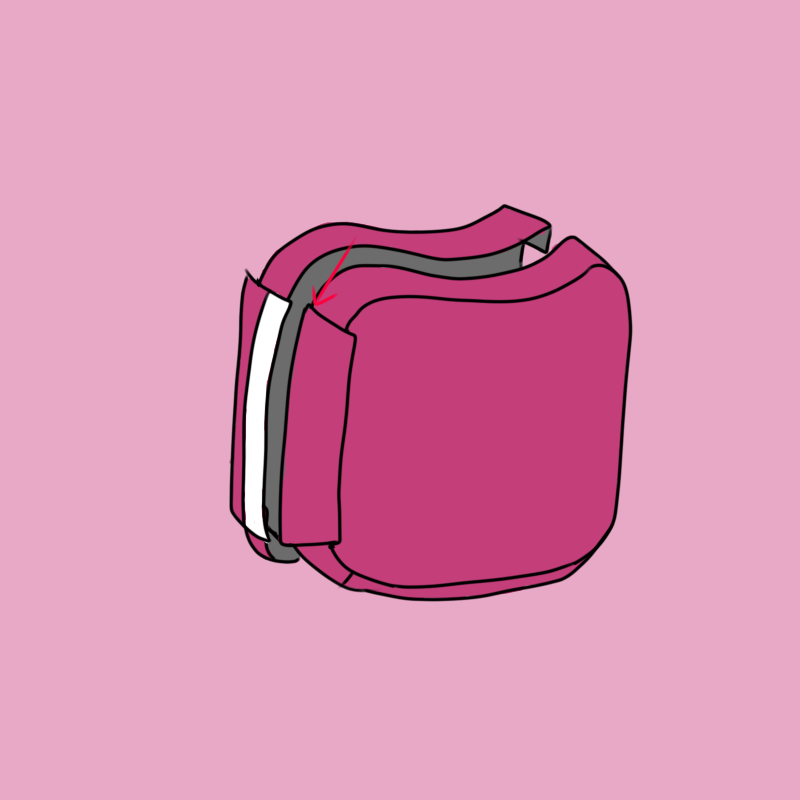
Step 6
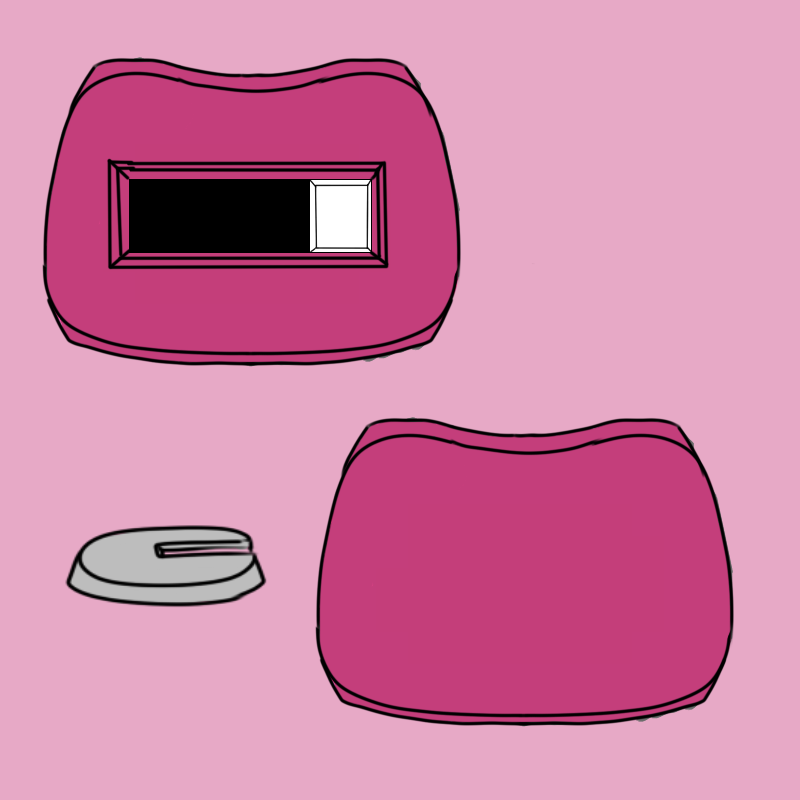
I did the same thing for the other side, only this time I made my fabric piece a bit wider so that I could cut it in the middle to add velcro.
Step 7
I then added velcro to the front of one side, and the back of the other.
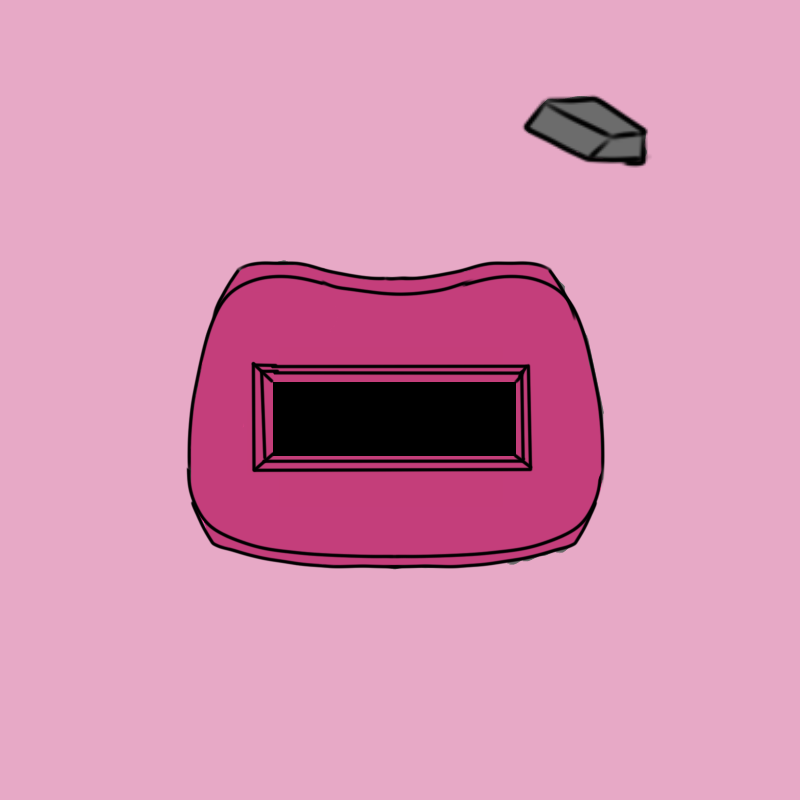
Step 8
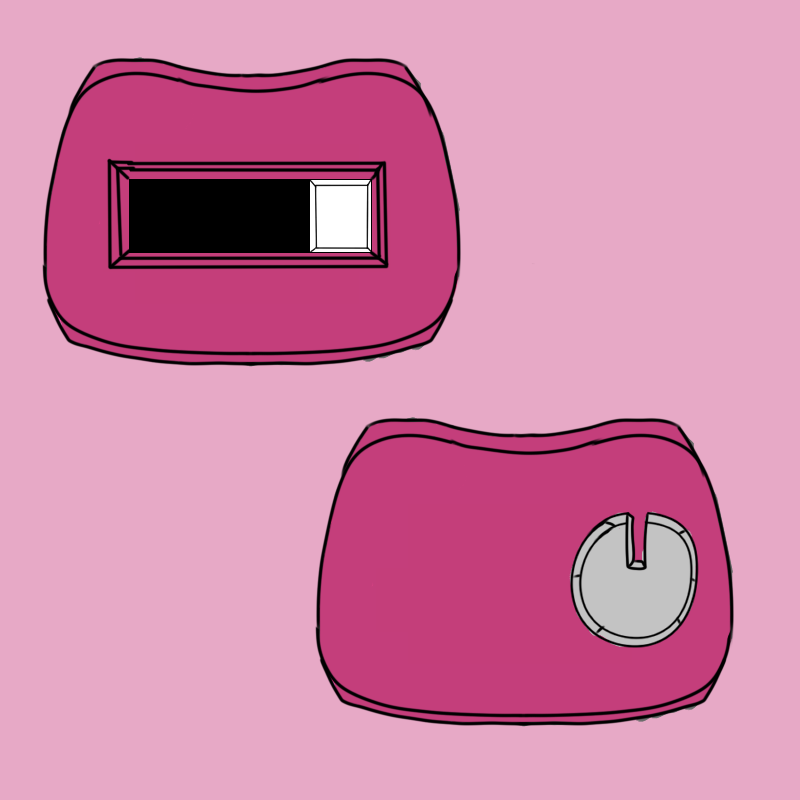
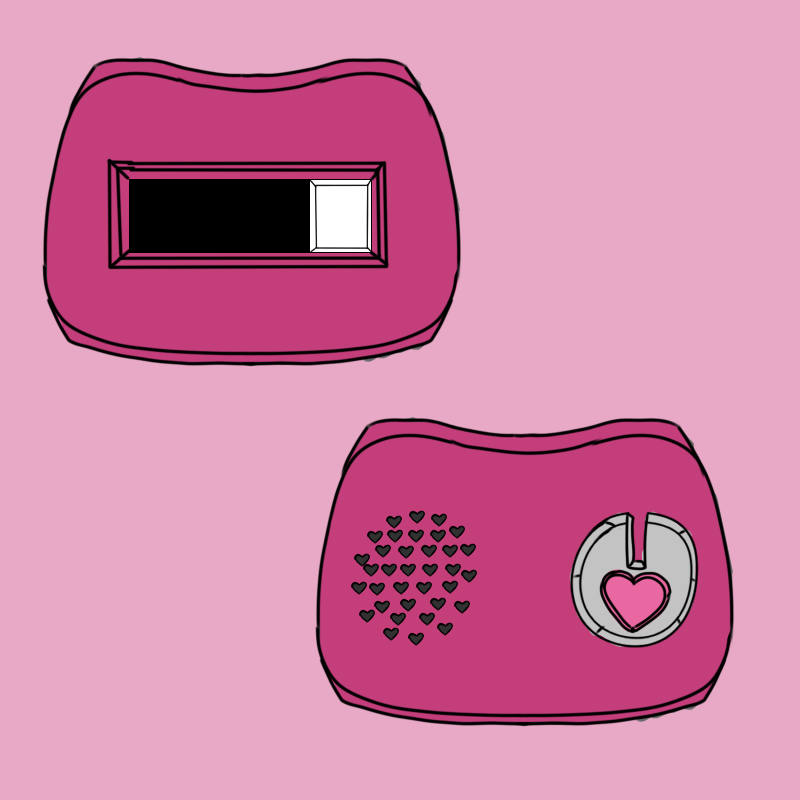
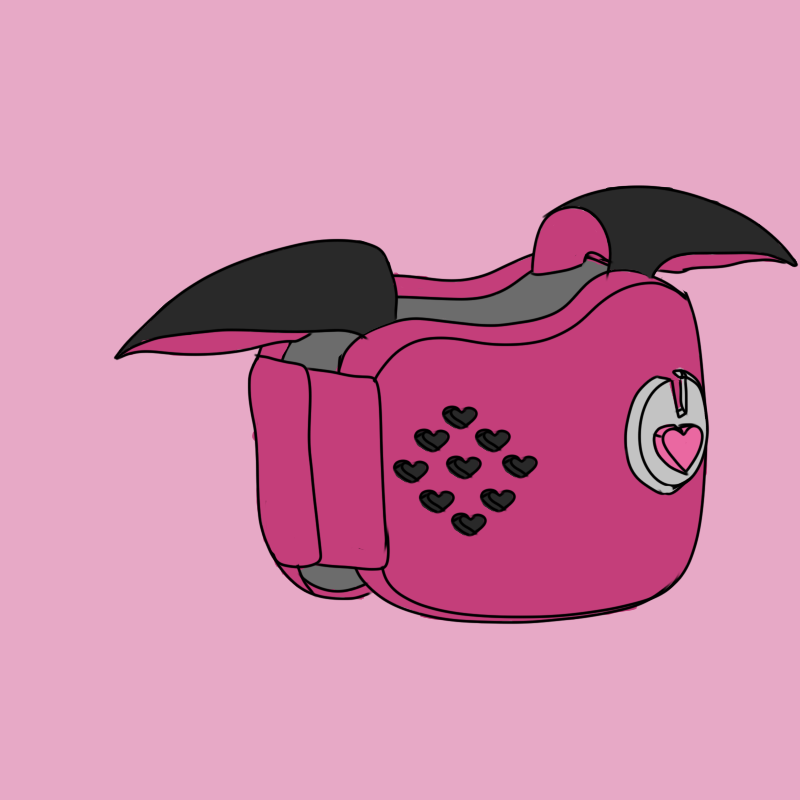
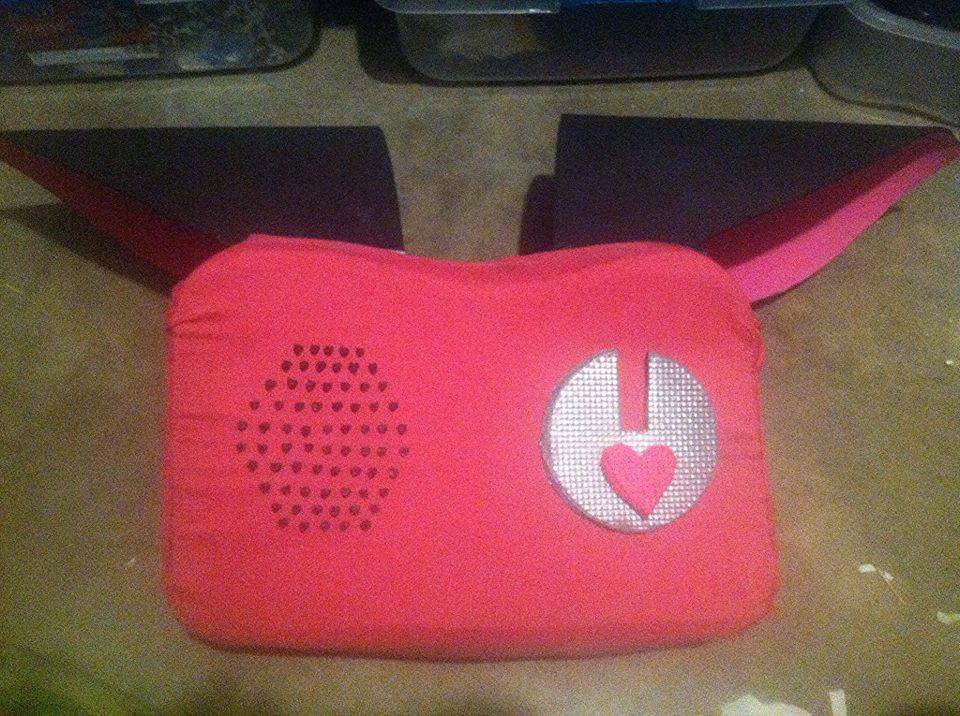
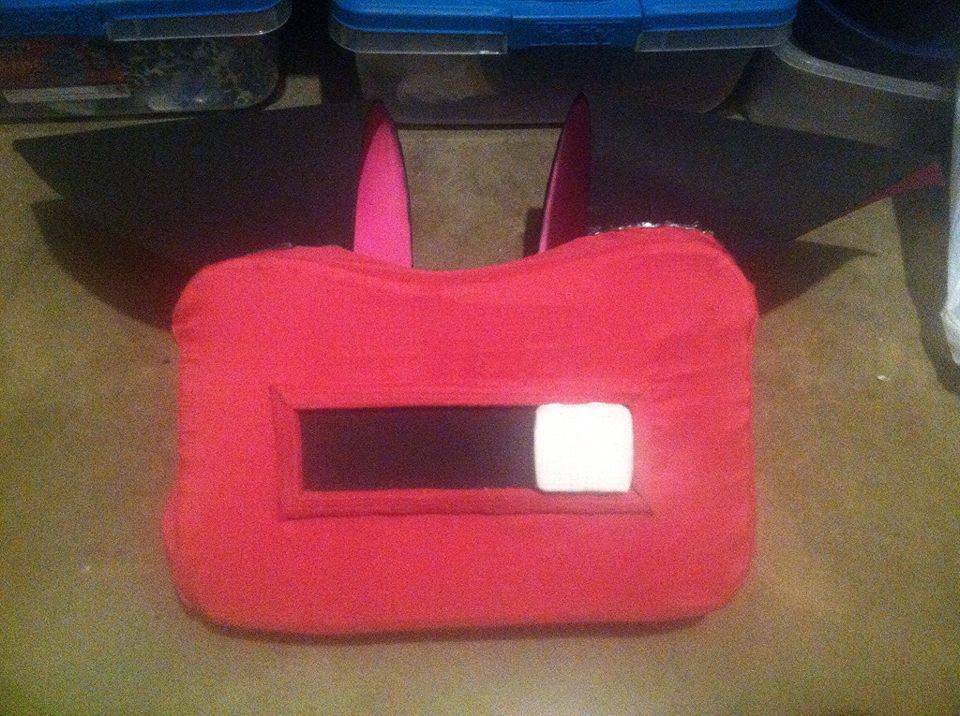
Now that we have the chest and back piece constructed and put together, it's time for decorating! We'll start with the back. First I took a piece of black craft foam that measured 9 inches long and 3 inches wide and glued it to the middle of the back. ( Again, adjust according to the size of your pieces)
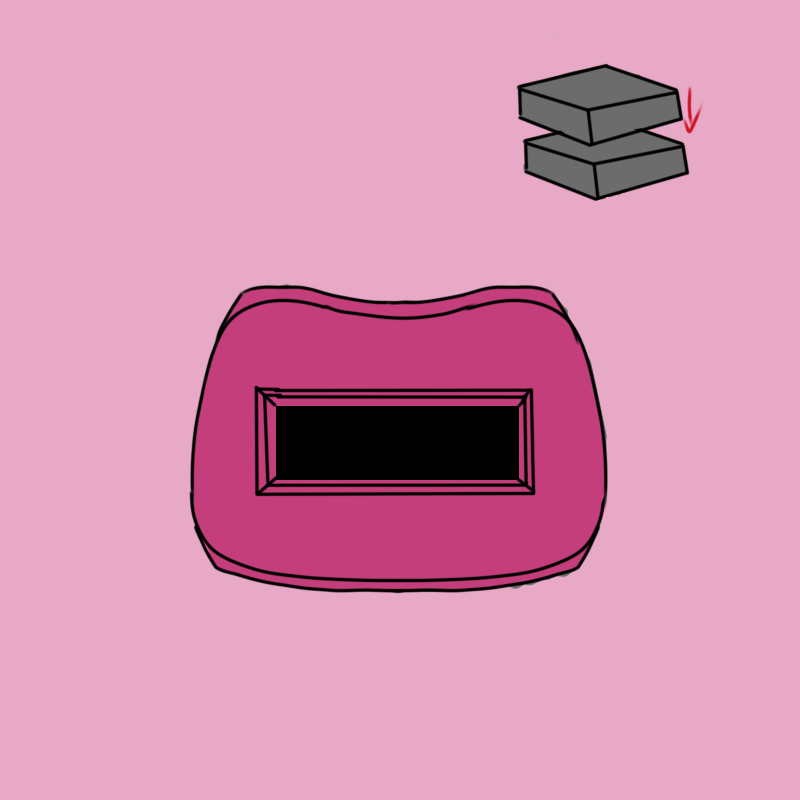
Step 9
Then I cut four pieces that would fit around my craft foam, and were only 3/4 inch wide. When cutting, I cut them at an angle, and after gluing the same pink fabric on them, I glued them on so that the angle faced away from the black.
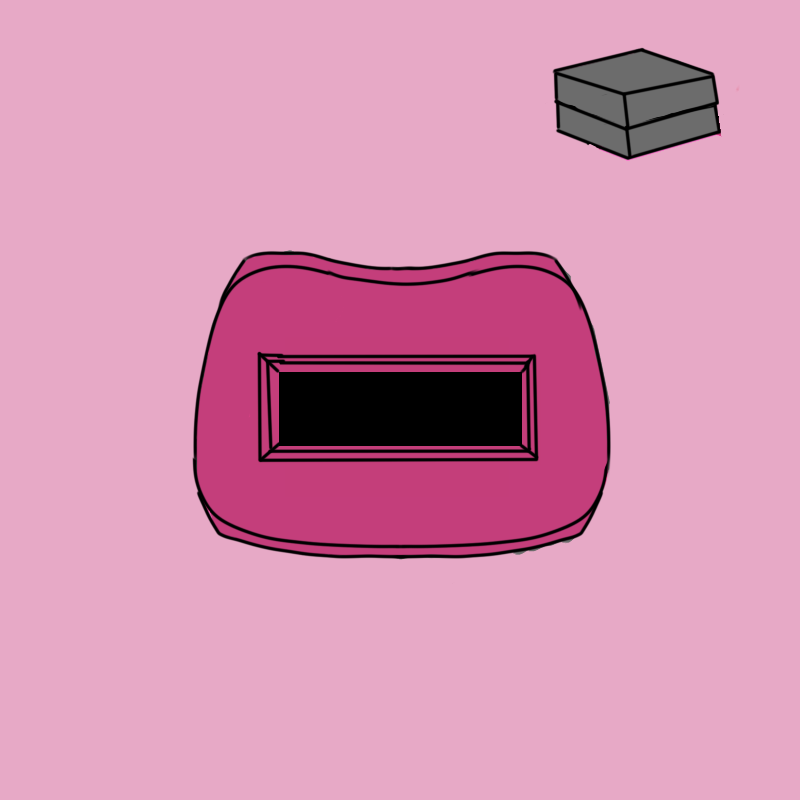
Step 10
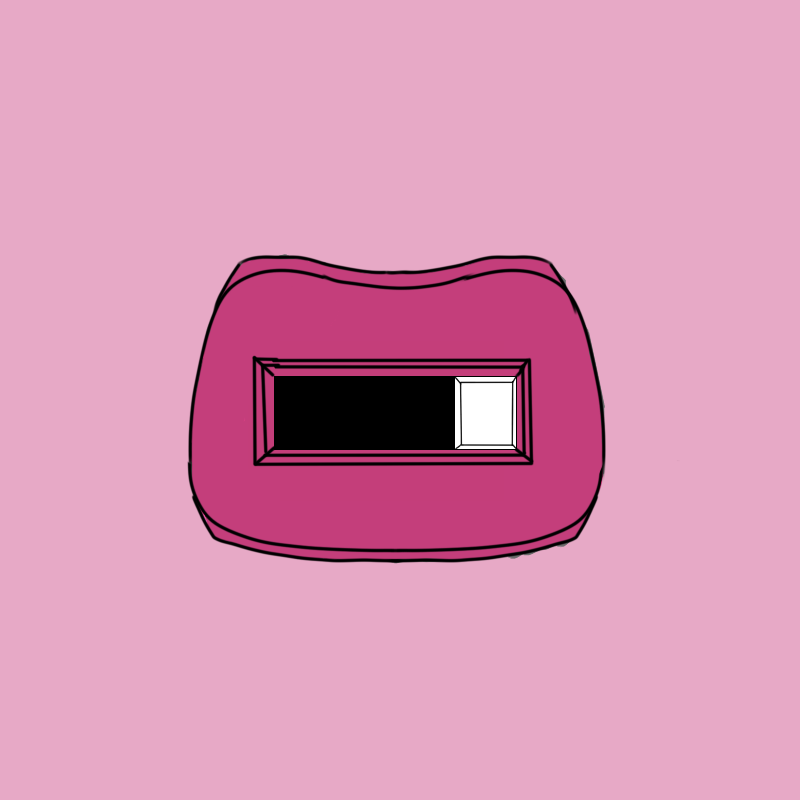
Next I cut 2 pieces of EVA foam that would fit inside the rectangle snugly.
Step 11
Then I glued white fabric over the square, and glued it into place.
Step 12
Now it's time for the front! First I took a large cup and traced it onto the EVA foam, my circle was 4 1/2 inches in circumference. I then cut it at an angle, and cut out a 2 inch long, 1 inch wide part.
Step 13
I then spray painted it silver and glued it onto the chest.
Step 14
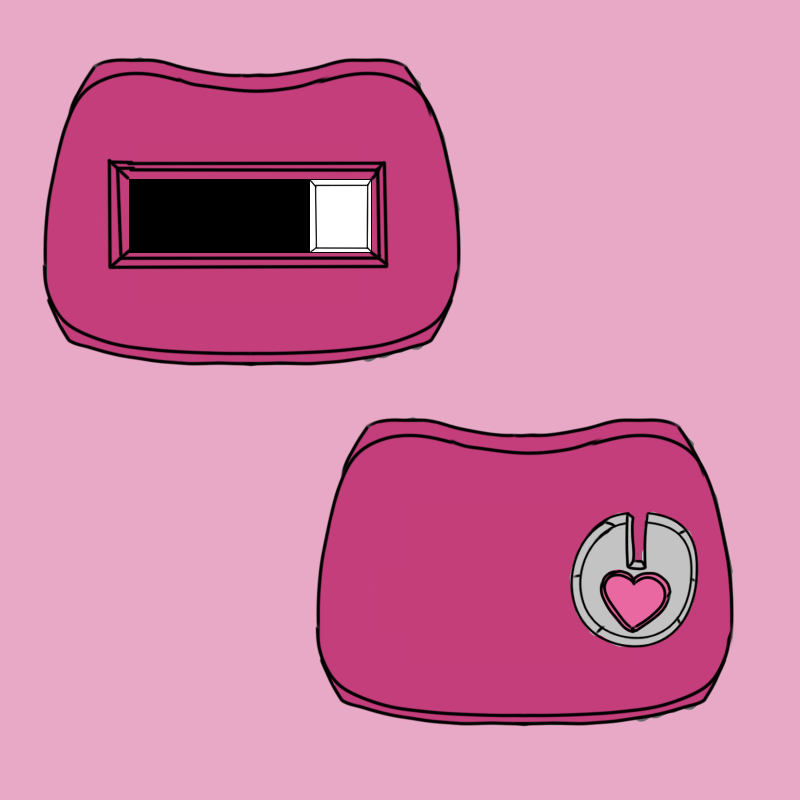
Next I cut out a heart shape that was 1 1/2 inches tall and wide, and after cutting it at an angle, I painted it pink and glued it onto the dial.

Step 15
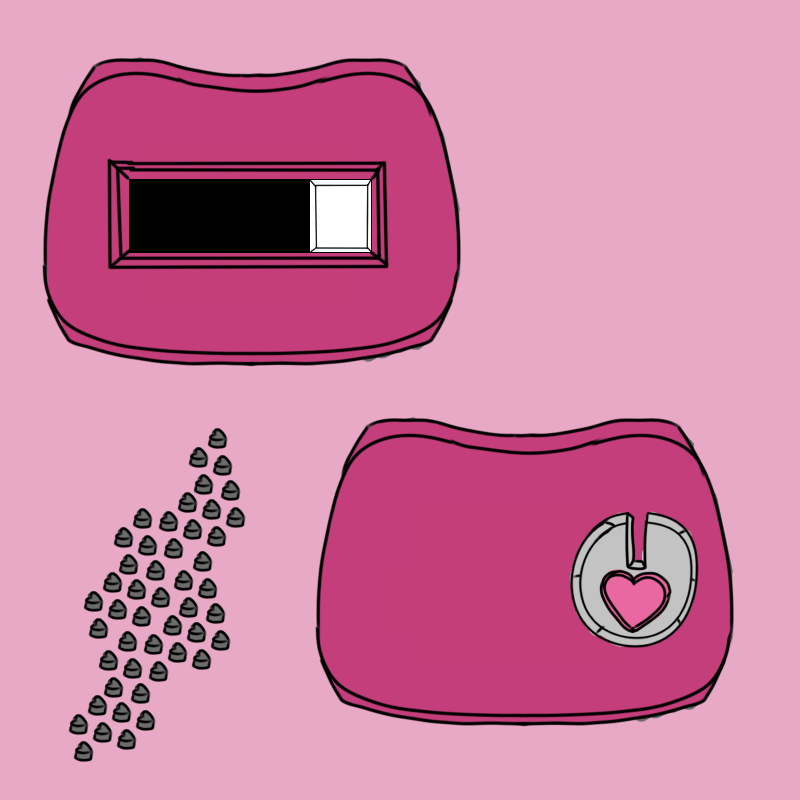
Next I grabbed my EVA foam (You can just use craft foam if you like but I liked the thickness of my EVA foam for this), and using my hole punch, I punched out a bunch of the foam. (I lucked out and my hole punch actually made little hearts). Total my chest piece has 70 pieces for the speaker.
Step 16
Next, I painted them black. I find the best way of doing this is just to put some black paint on a paper plate and roll the foam in it, then set it to the side to dry.
Step 17
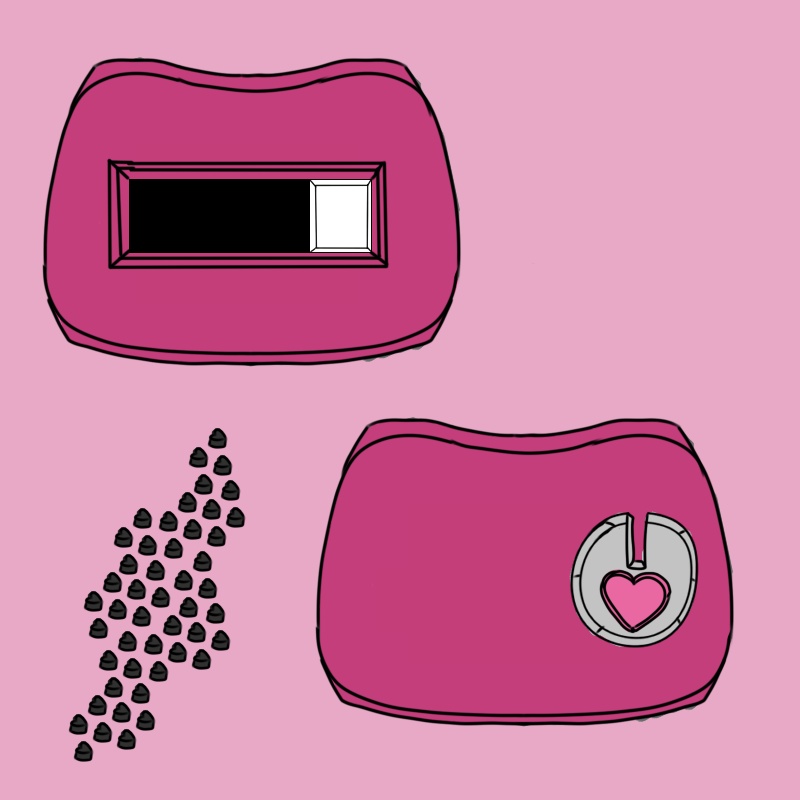
Then I just glued them on in a circle shape. Tweezers help a lot with this part.
Step 18
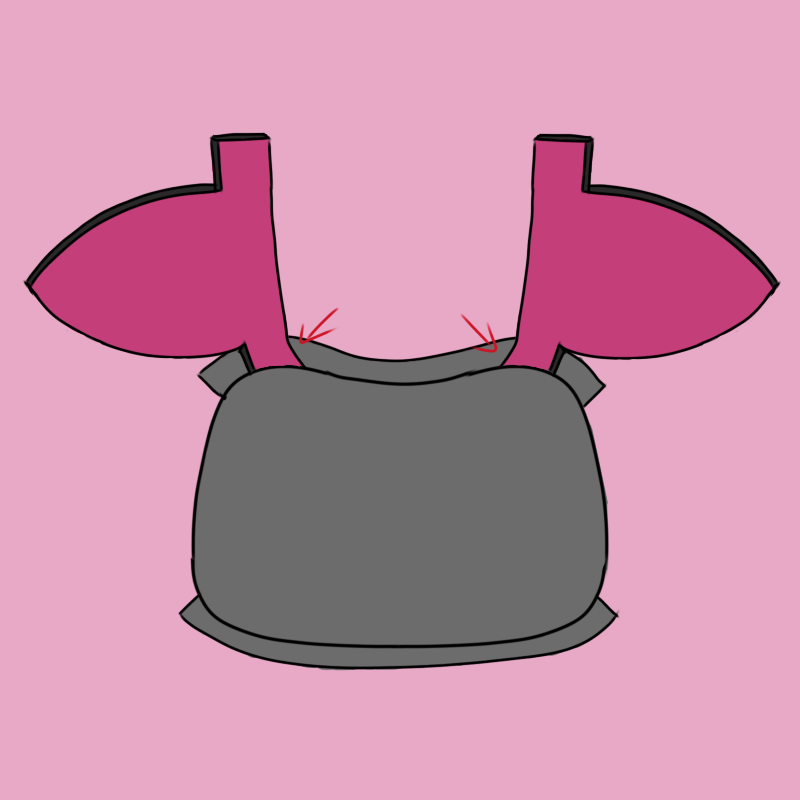
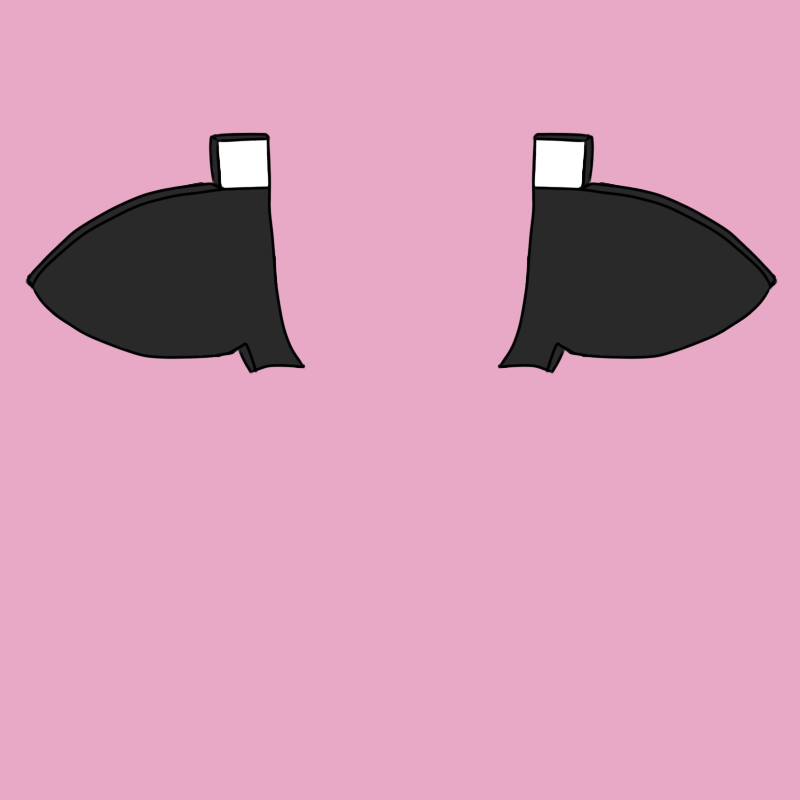
Next we can move on to the shoulders! Now my shoulders measured 17 1/2 inches long and 3 1/2 inches wide at the tab base, then from 13 1/2 inches down to 3 inches at the tip. My shoulders are also 12 inches long. I cut these shapes out of my pink and black craft foam twice, and twice from my poster board as well.
Step 19
Next I glued the pieces together, pink on the bottom, then the poster board to give it more stability, and lastly the black foam on top. I did this for both shoulders.
Step 20
Next, after figuring out where I wanted the shoulders to be, I glued the one end of the tabs to the inside of the back piece.
Step 21
I then added velcro to the top of the other tab
FINISHING
As well as the inside of the inside of the chest piece, this way I could easily velcro and unvelcro the shoulder pieces to get in and out of the costume.

And that's it! You now have a Mettaton chest and back plate with shoulders.
I hope this tutorial helped anyone who needed it. Feel free to check out my Youtube channel, Facebook, or Instagram. If you have any questions, please feel free to message me on there, or email me (email on contact me page)