This project only cost me about $6
Supplies
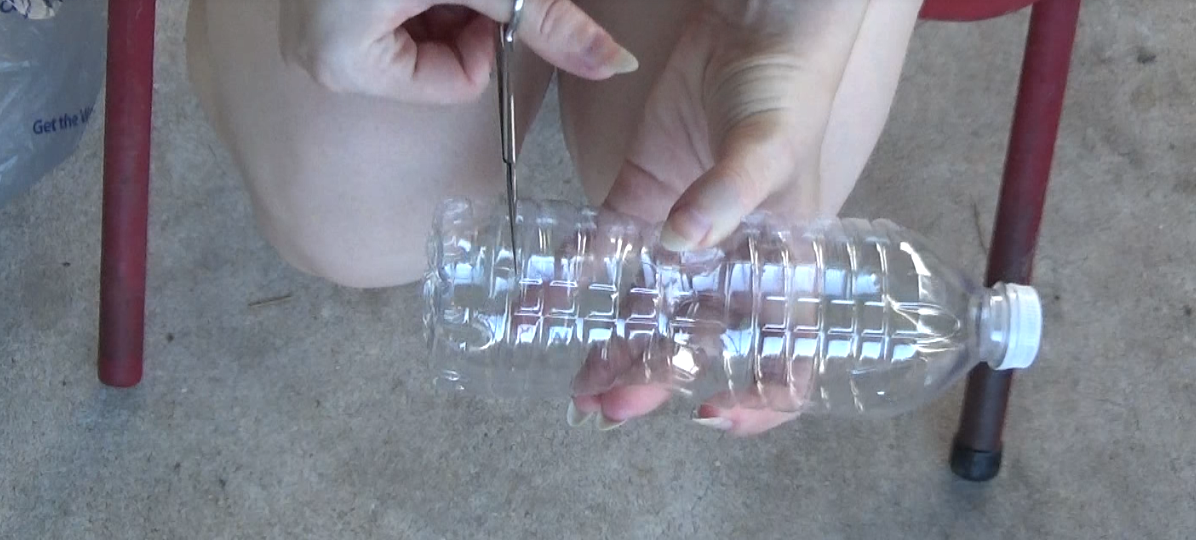
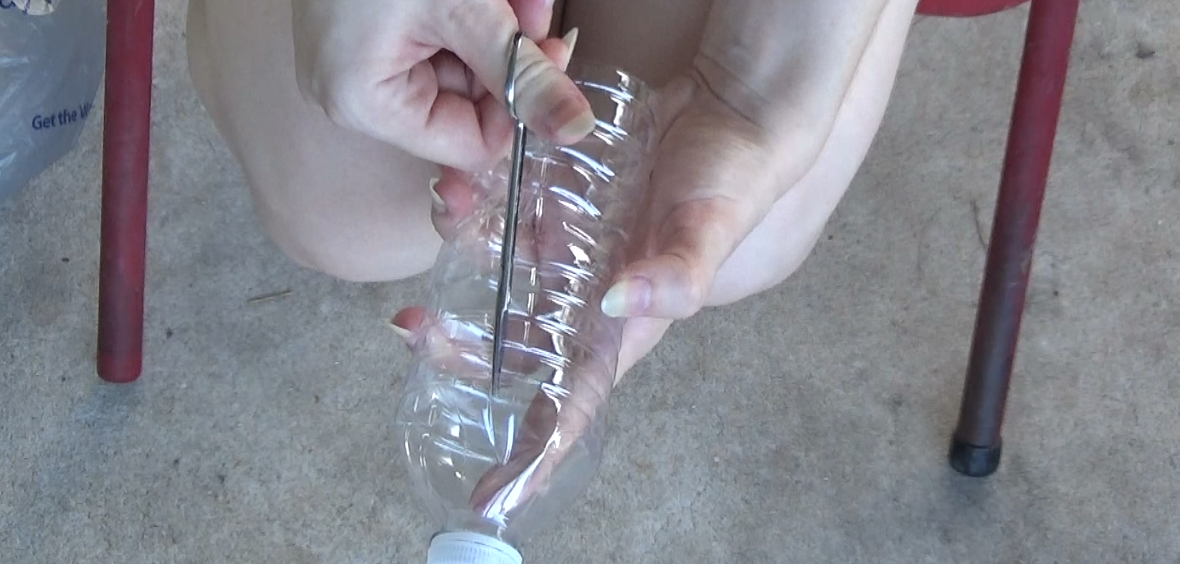
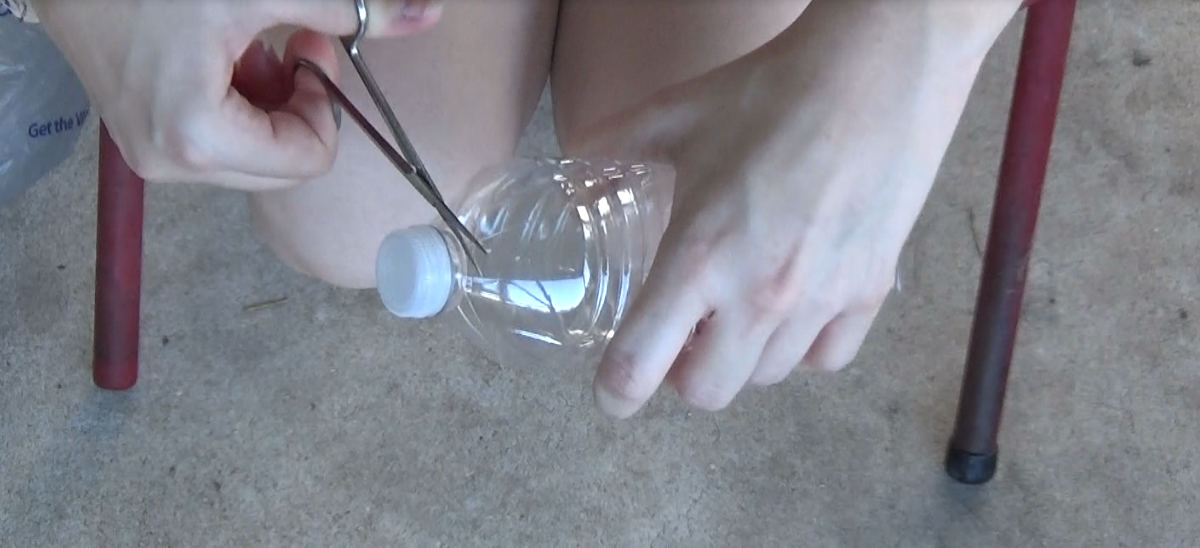
sTEP 1
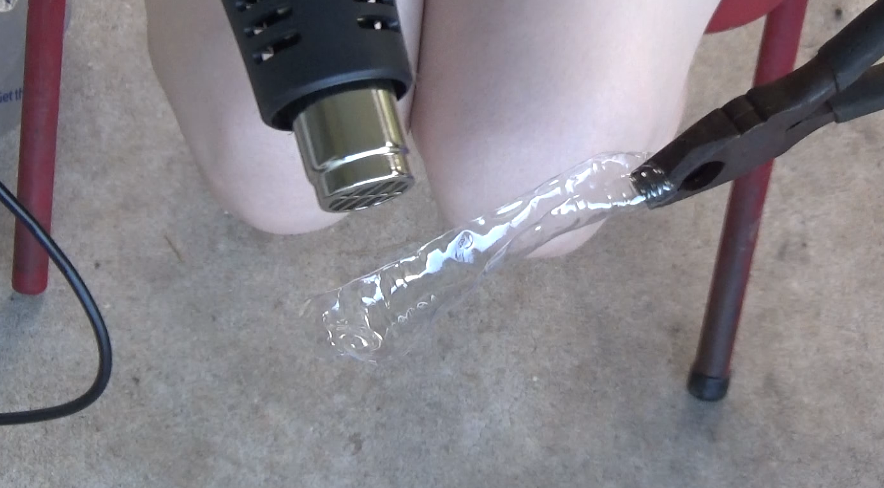
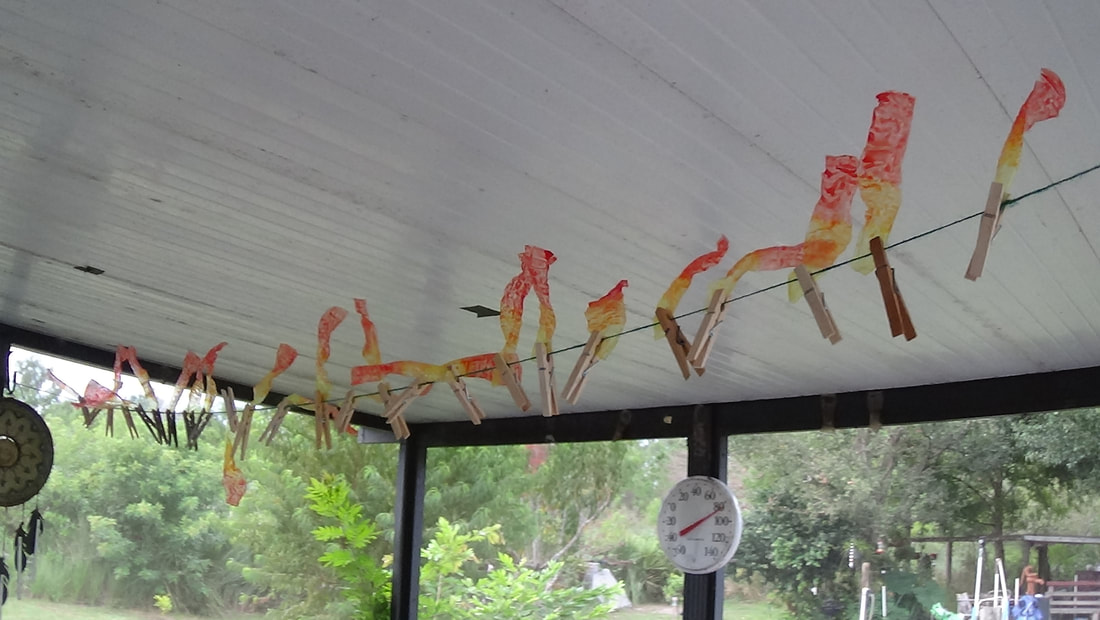
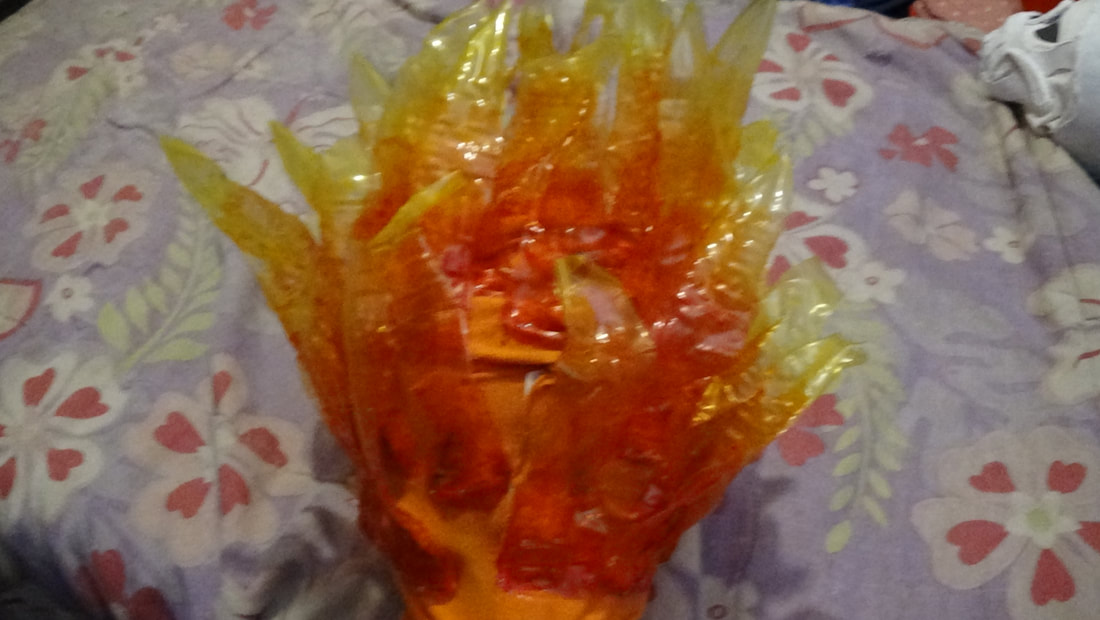
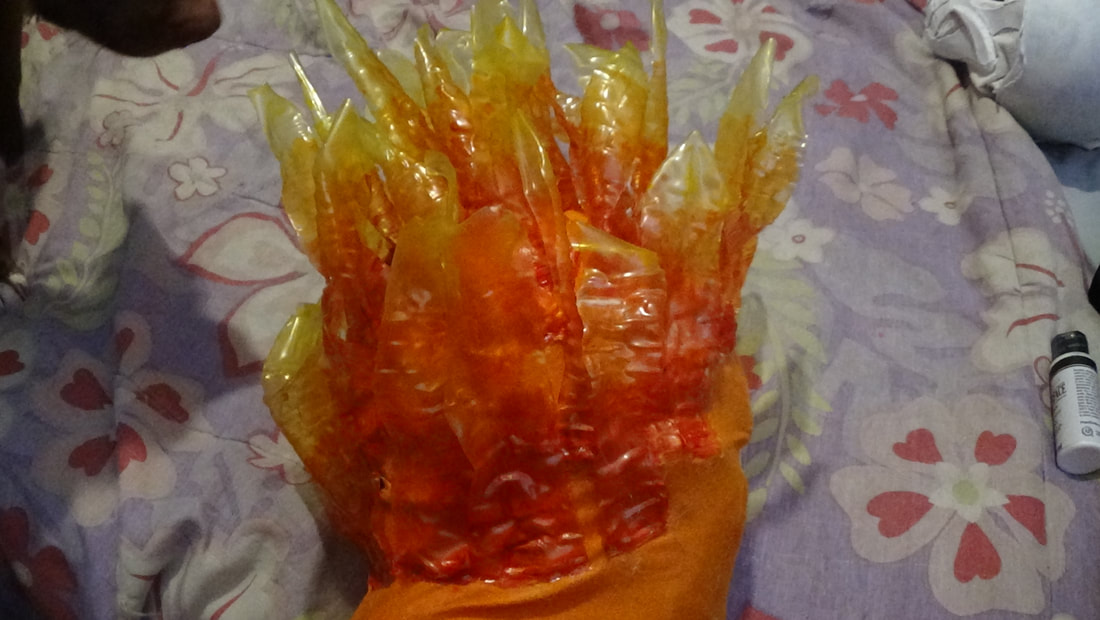
We're gonna start out by prepping our flames, because we are gonna need a lot. Total on mine I had 57 flames, but this number will depend on the size of your mask. First we're gonna cut the bottom of the bottle off, then cut up one side, and cut the top off. Then we will just be making cuts along the other 3 sides until we have 4 pieces, these will be the flames.
Step 2
Next comes the fun part (to me anyways), if you are younger please have an adult help you with this, heat guns are not toys and can be very dangerous! Even if you are older always take precautions when using a heat gun, especially went melting plastic since you don't want to breath it. Make sure to wear a mask, eye protection, heat safe gloves, and if you can, hold your flames with something so that your hand is far from the plastic, the plastic itself doesn't get very hot, but the heat from the heat gun can burn you. Don't hold the gun in one place for too long or you could burn the plastic, and also don't worry if not all of your flames are "perfect" no two flames are alike.

Step 3
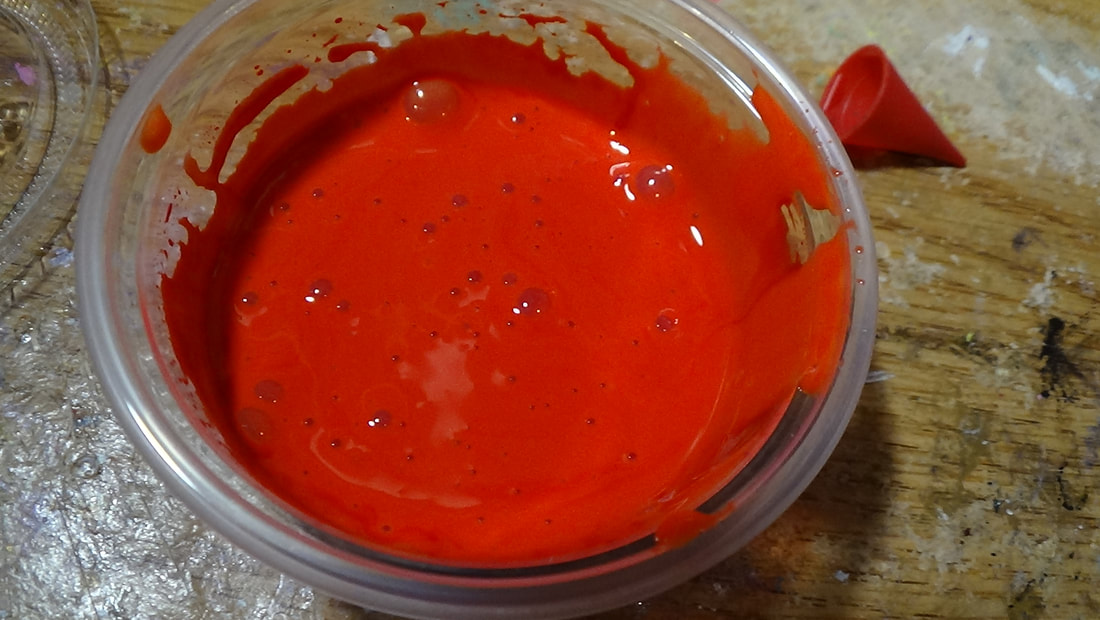
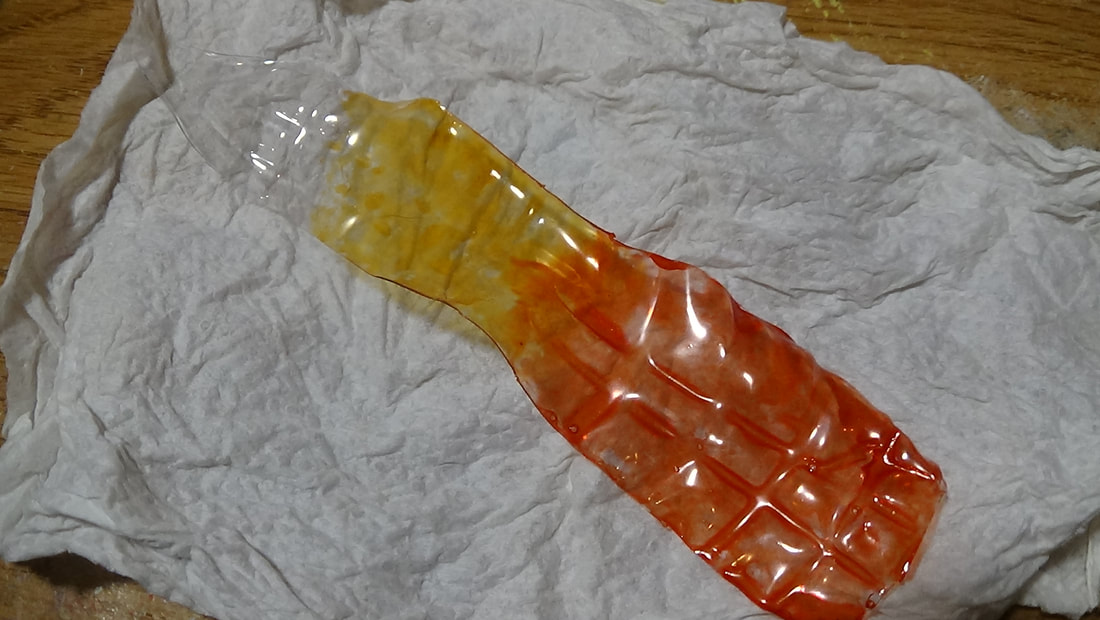
Once all of the flames are made, it's time to paint. Now the reason we are doing this AFTER curling them, is because if you painted them first, the glue would melt and it would just be a big mess. So for the red I used 20 drops of red food coloring and 2 drops of yellow just to give it an orange undertone, and then I painted the bottoms of all of the flames, you may have to do two coats since the glue wants to separate on the slick plastic.
For the orange I used 10 drops of yellow and 5 drops of red, and then painted that on the middle of the flame, bringing it into the red a bit.
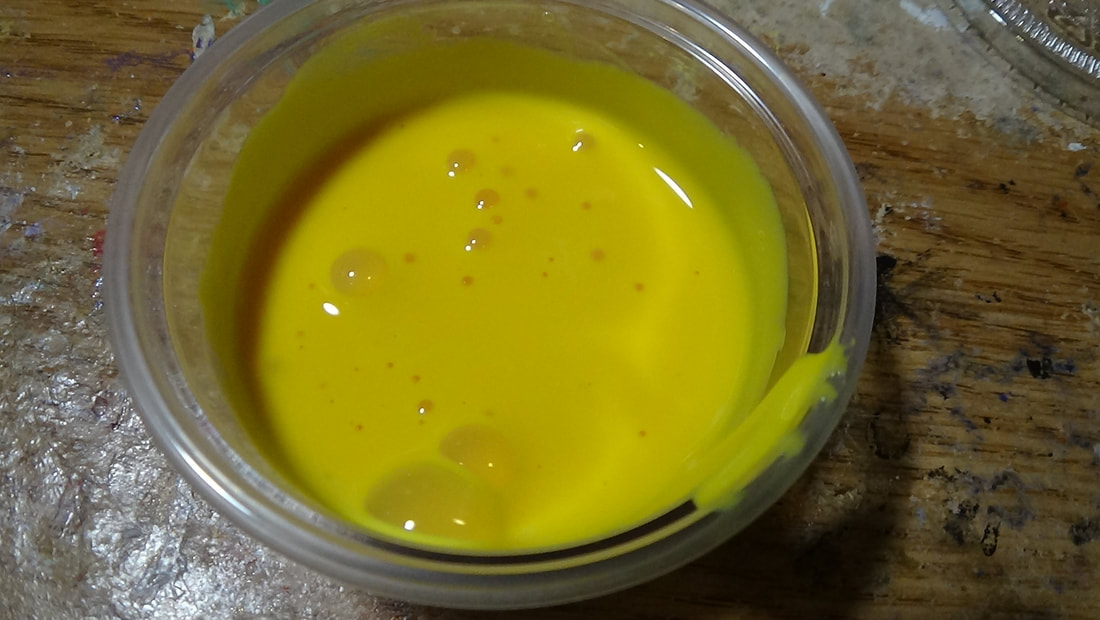
For the yellow I used 5 drops of yellow and painted that on the tops, bringing it down into the orange a bit.
For the orange I used 10 drops of yellow and 5 drops of red, and then painted that on the middle of the flame, bringing it into the red a bit.
For the yellow I used 5 drops of yellow and painted that on the tops, bringing it down into the orange a bit.


Step 4
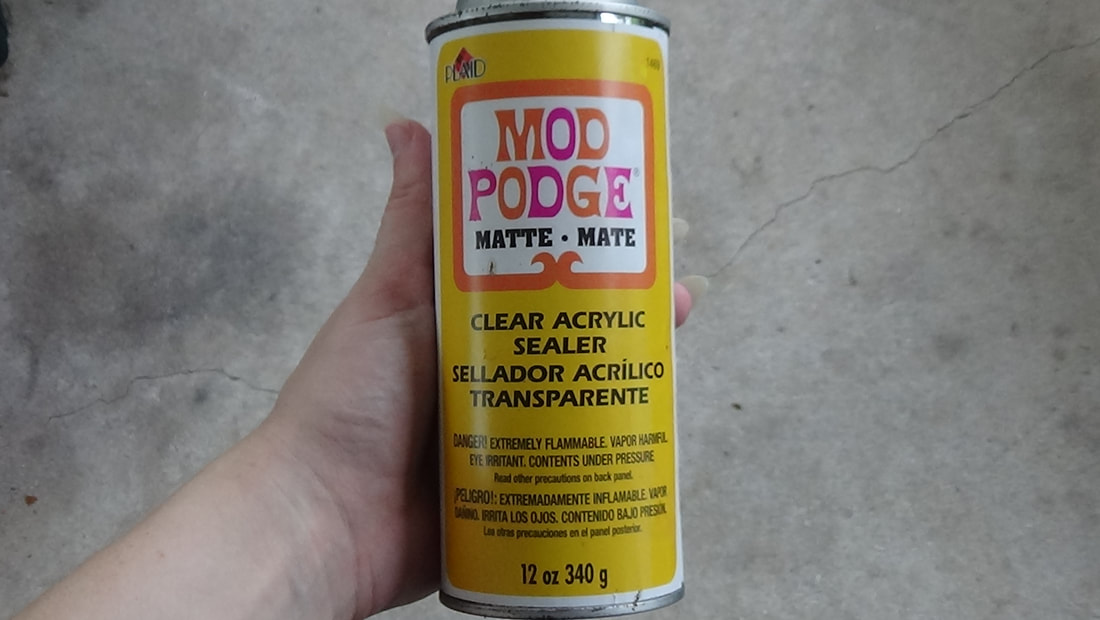
Once they are all painted you'll want to seal them. this is something I COMPLETELY forgot to mention in the video tutorial, but it is VERY important. You want to seal your flames after you paint them because glue is water based, and if your flames were to get wet, the glue and food coloring would get EVERYWHERE. So please please seal the flames. I used a matte sealer so that it would give them a frosted look that would defuse the lights a bit more.
Step 5
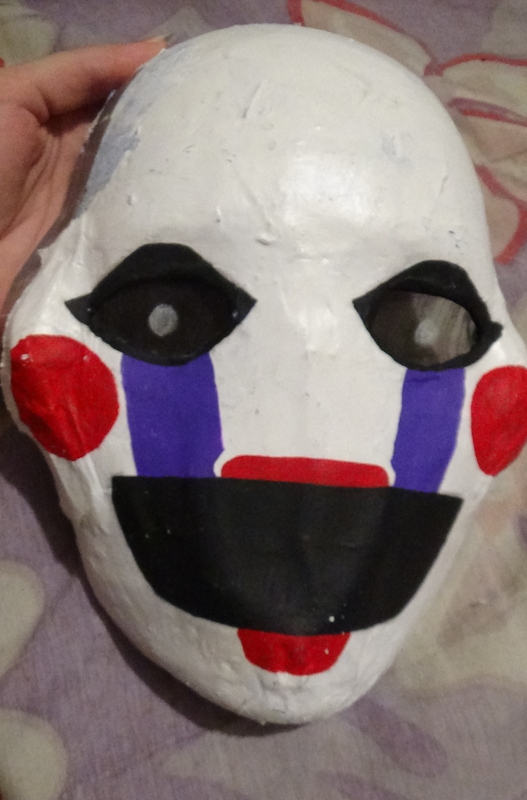
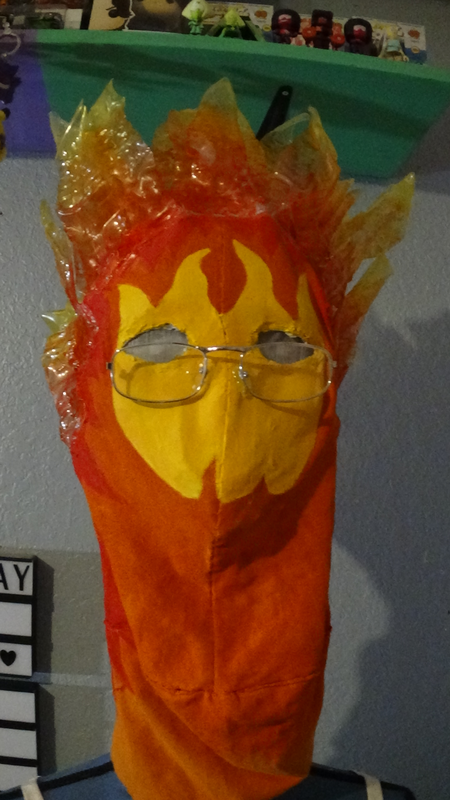
Now that our flames are ready to go, we can move onto the mask. I am actually going to be deconstructing the Marionette mask that I made last year.
Step 6
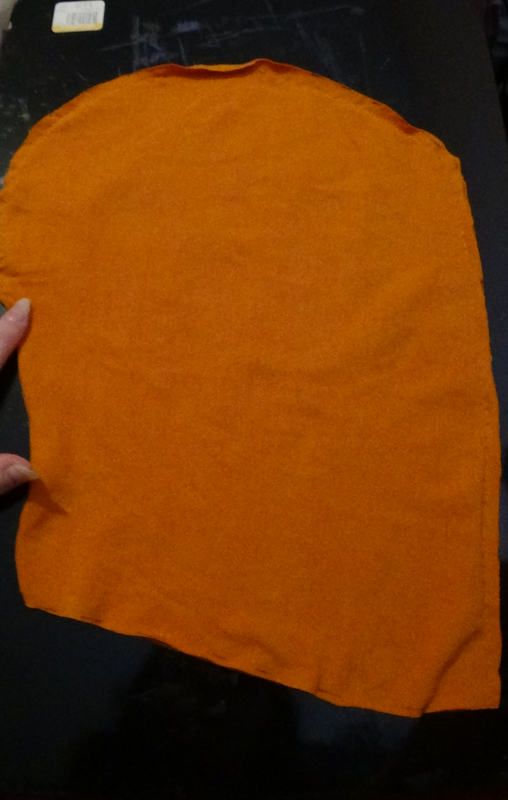
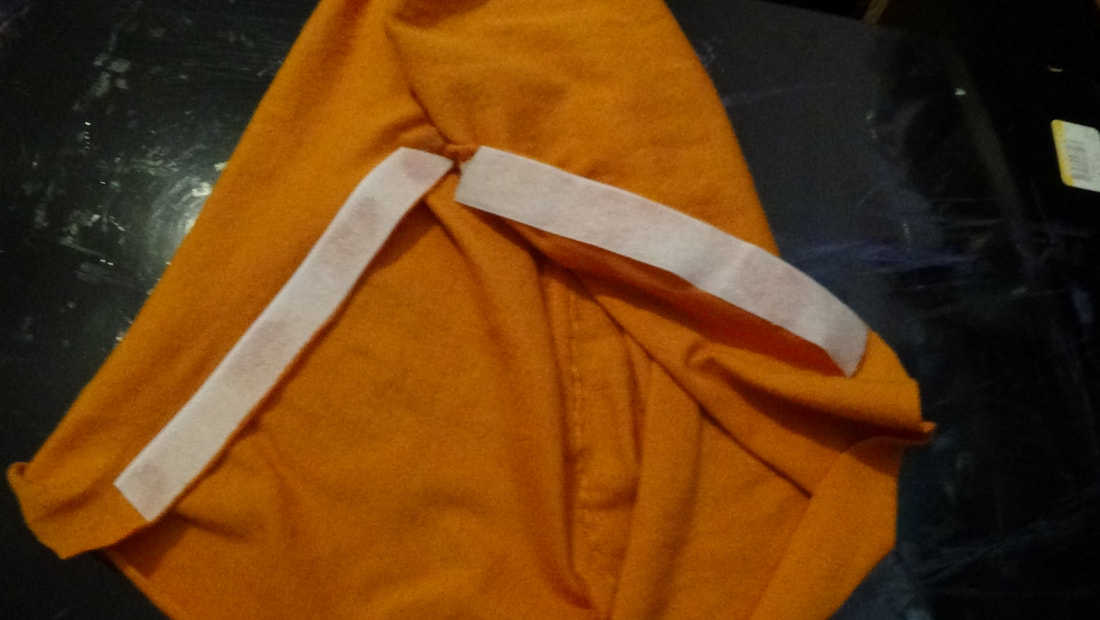
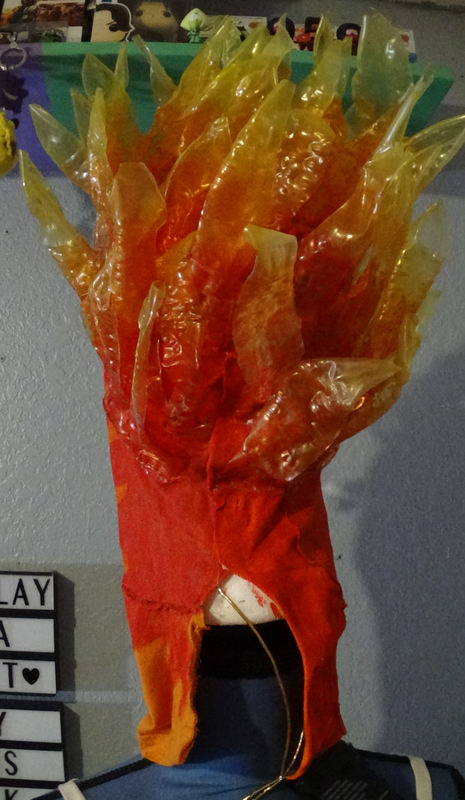
I just used a simple balaclava pattern and cut it out of an orange t-shirt, making sure to not cut the eye holes. I stitched it up on the front and halfway down the back, I left some open because I knew that I would be adding Velcro so that I could get it on and off easier. With the plastic flames glued to it, I knew that it would be impossible to just slip on and off my head.
Step 7
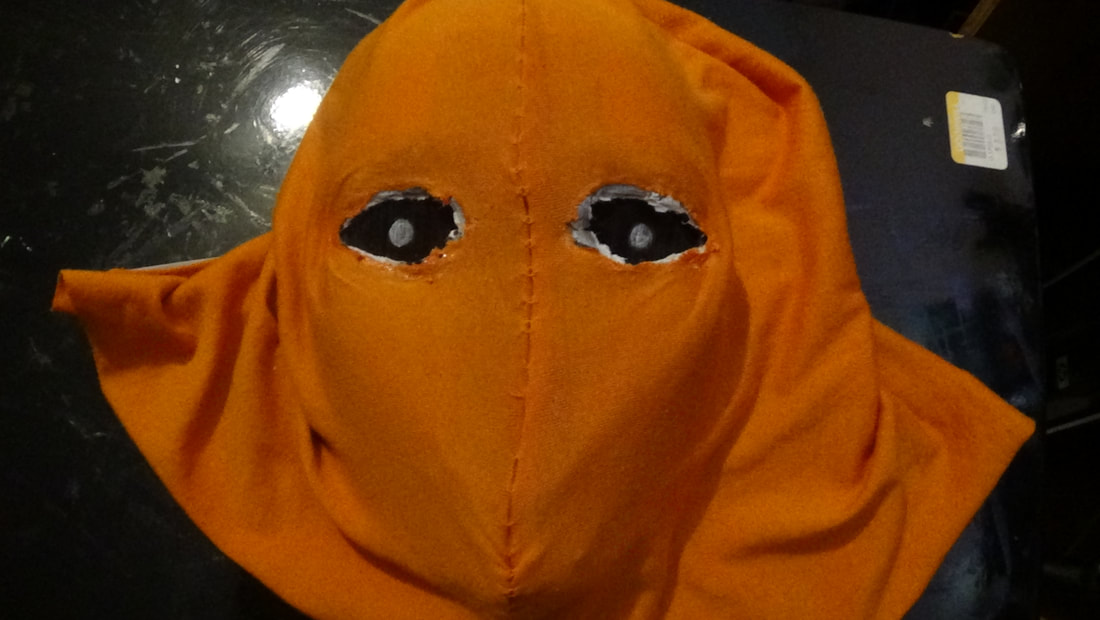
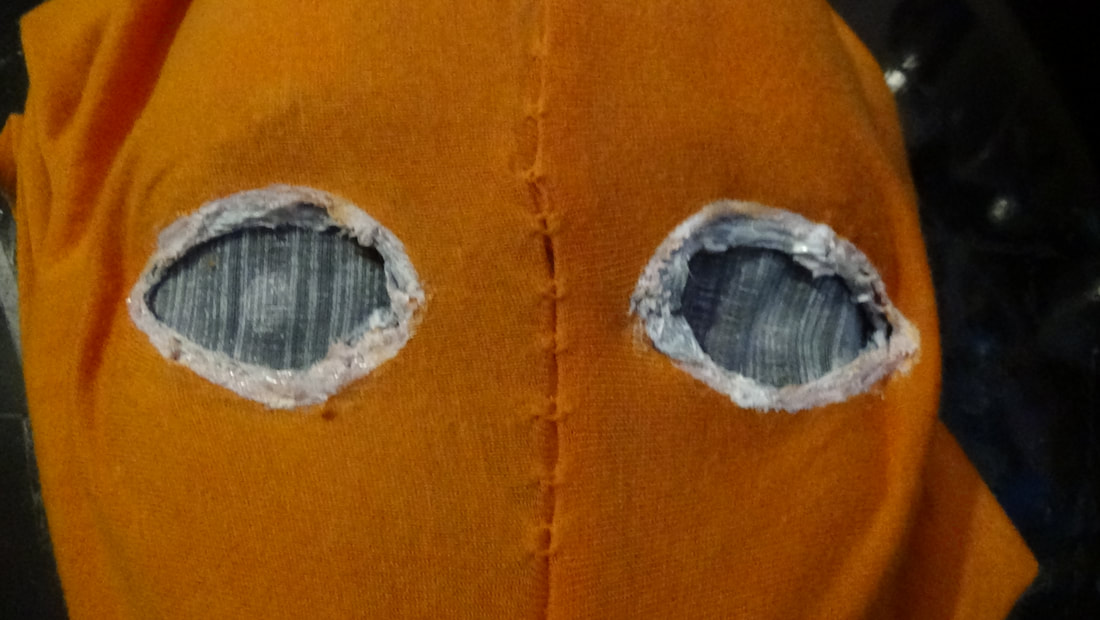
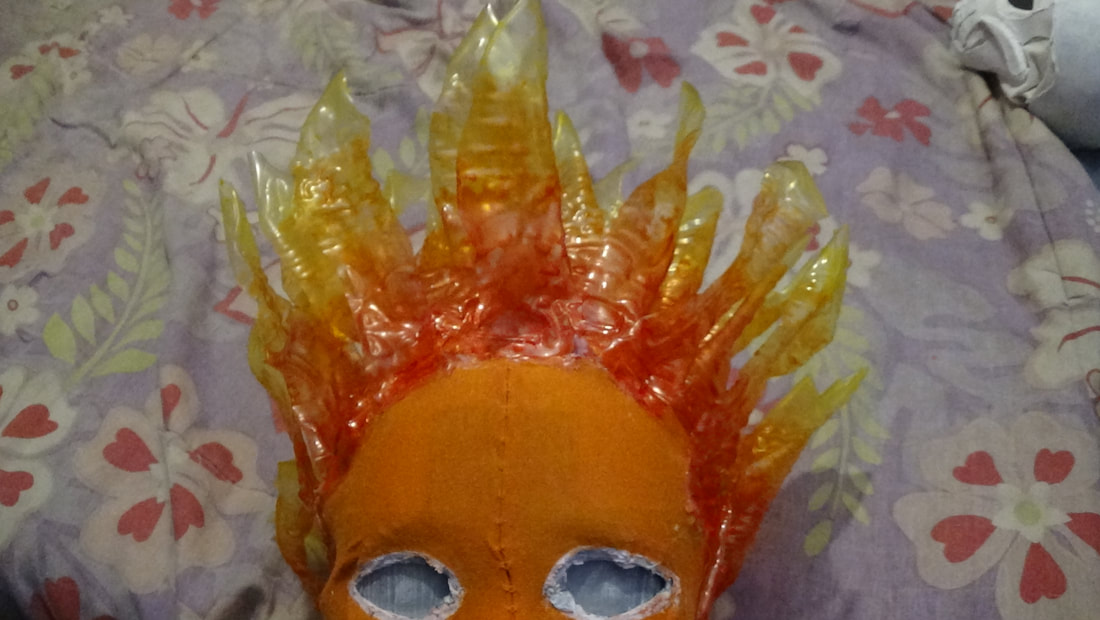
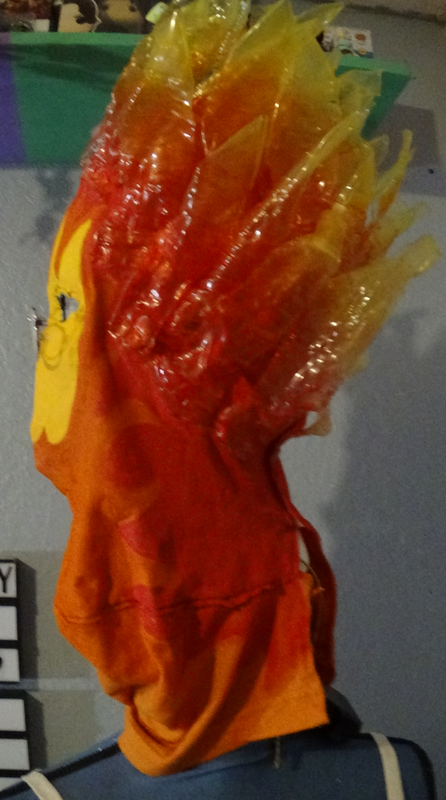
Next I glued it onto the mask, now my mask already had the nose and mouth cut off of it from the Marionette, but if yours doesn't, you'll want to do that so you get no features look that Grillby has. I also cut where the eyes were, glued them down, and painted them white. You could also add sheer white fabric, but my mask already had this mesh, and I didn't mind painting it.
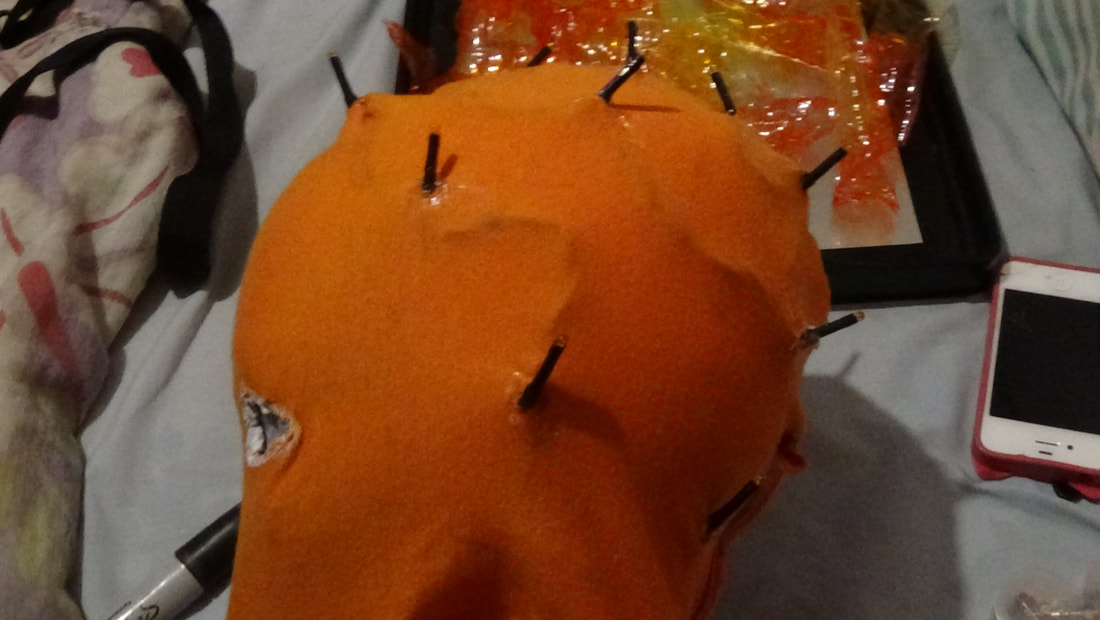
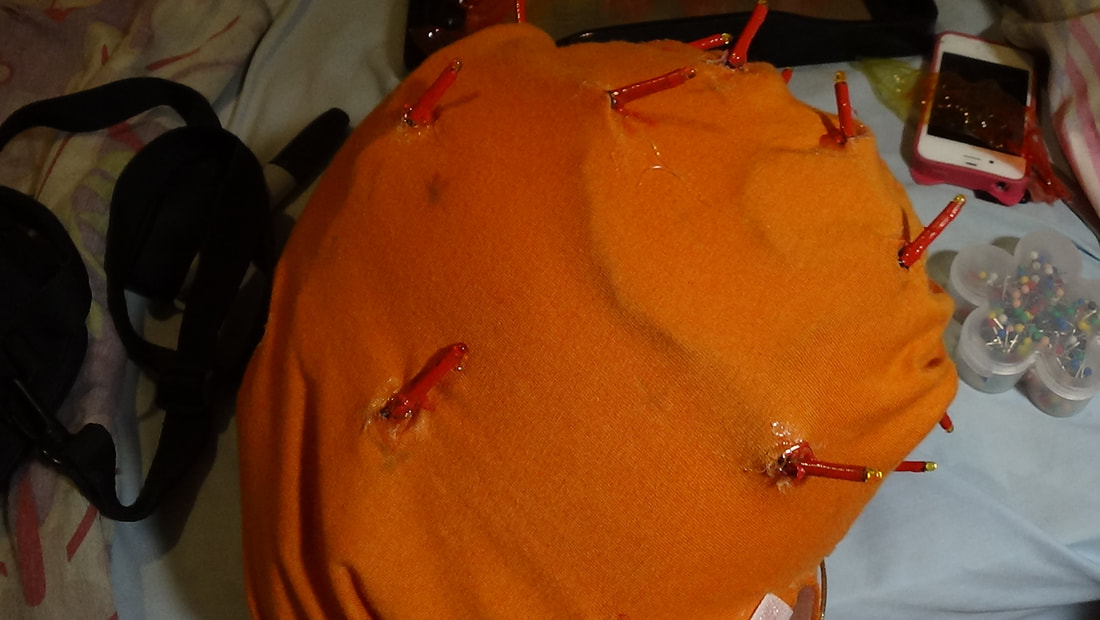
Step 8
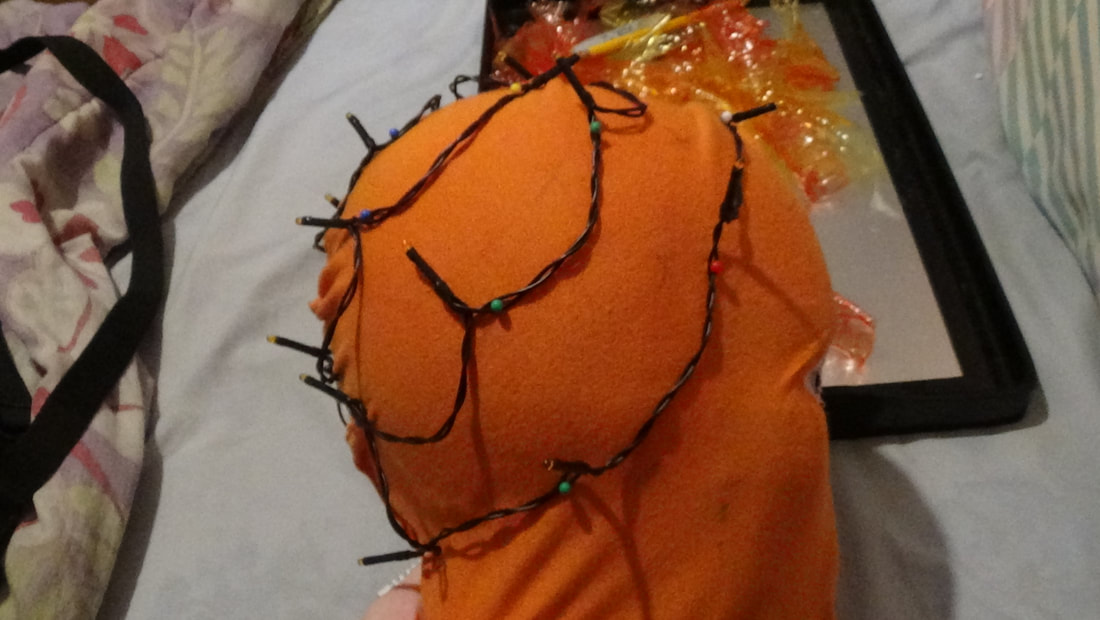
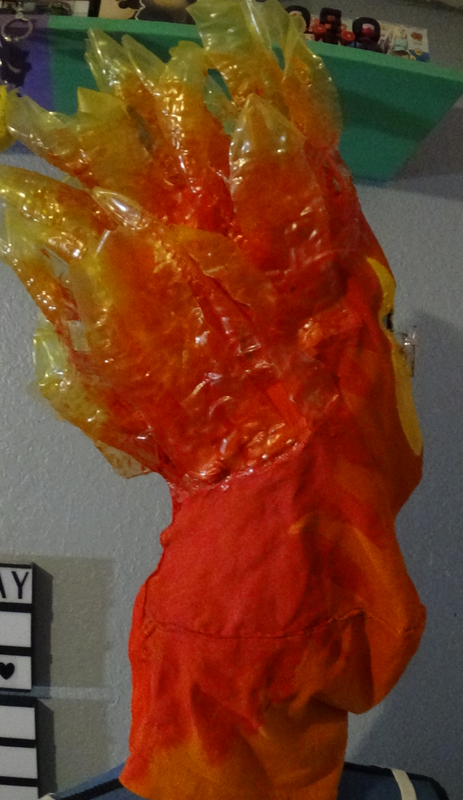
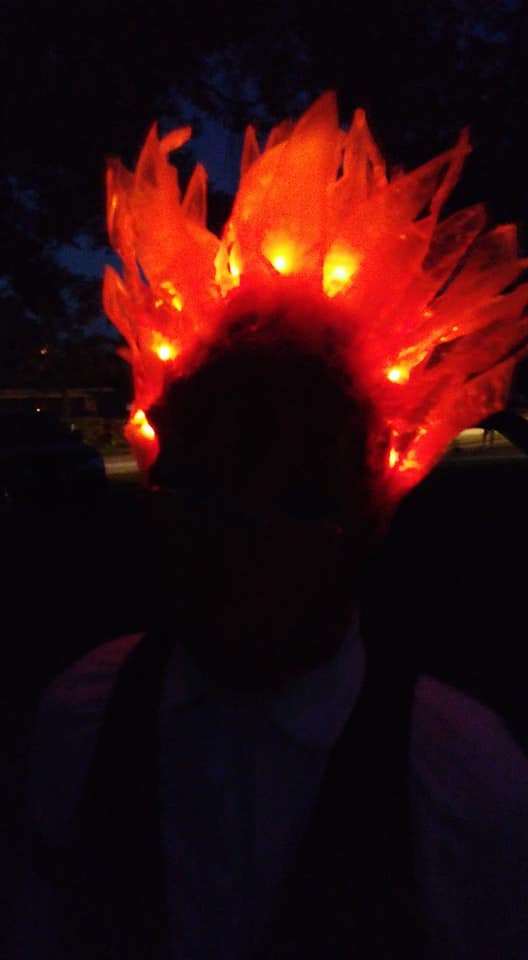
Next I put my mask on a wig head and began pinning the lights in place, I put the battery pack at the back and just strung the lights around the head. I did this so that I could mark where each light sat, so that I could then cut a hole and sting them up through the holes from the inside, so that the wire was all in the mask. After I had them glued in place, making sure I used a LOW TEMP so that I didn't melt my wires, I painted the base of each light red, and sealed it with a bit of clear nail polish.
Step 8
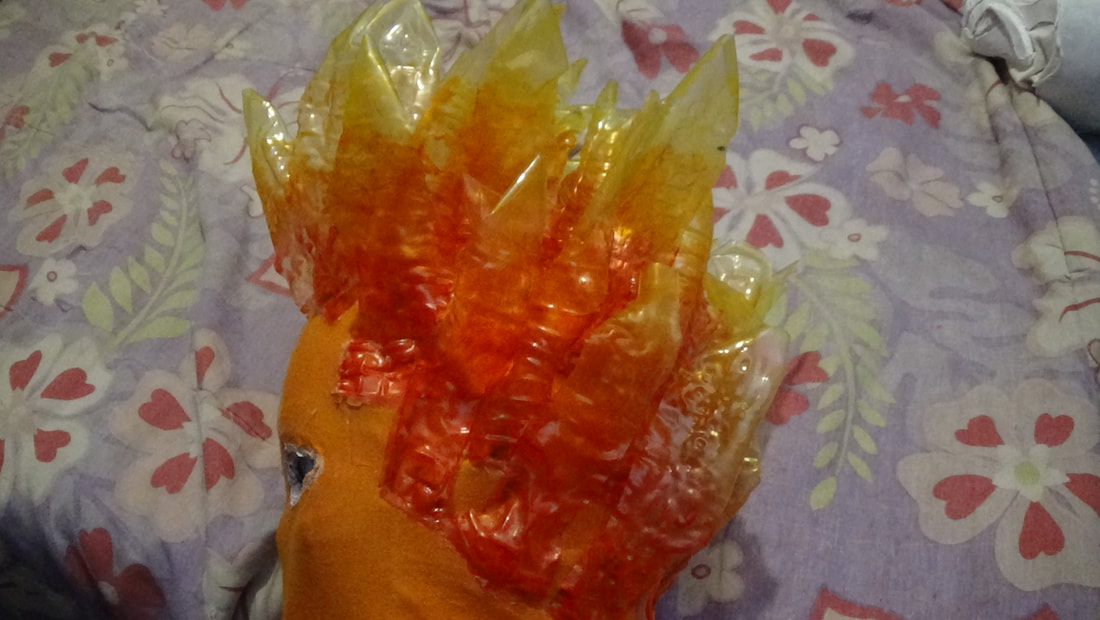
Next it was time to glue on the flames, now I didn't do this, but I HIGHLY recommend that you paint your balaclava red where your flames will be, I didn't and I had to go back and try to paint in between each flame...which was a pain in the butt. So once it's all painted, just start gluing your flames on, I tried gluing mine so that they leaned back a bit, and I also glued some together to help with that effect.
Finishing
Now I didn't glue flames all down the mask, and here's why. 1 I didn't have enough flames lol. and 2. I realized that it would have hindered my eyesight, and knowing that I was going to be wearing this to a party and trick or treating, I didn't want to be accidentally bumping into people or running over children because I couldn't see. So instead I decided to paint on more flames. (I also had to add a bit to the bottom so that it tucked into my dress shirt). After the flames were painted on I took the arms off of the glasses, put the mask on, and with my glue gun on a LOW TEMP so that I didn't burn myself, I put some hot glue on the nose pads, and put them on my nose, I also added a bit more hot glue once I took the mask back off just to hold them better. And with that I was finished!
I hope this tutorial helped anyone who needed it. Feel free to check out my Youtube channel, and other social medias. If you have any questions, please feel free to message me on there, or email me (email on contact me page)